- Nandoshi - Pune - 411024
- +91 - 97641 13247
- AESPL4@GMAIL.COM

When structural connections fail on a job site, the fallout goes far beyond project delays. Choosing or installing the wrong anchor in a pre-engineered building, a pump skid, or a highway barrier can lead to expensive rework, safety hazards, and compliance failures.
Most field failures do not happen because the product itself is defective. Instead, they occur during installation. A hole isn’t cleaned properly, the resin is given insufficient time to cure, or the adhesive doesn’t match the substrate.
At Aim Tech Engineering, we have manufactured and supplied anchor bolts and foundation fasteners for more than 25 years. This guide draws on that field experience to provide a practical, step-by-step breakdown to help site engineers, civil contractors, and installation teams get chemical anchoring right the first time.
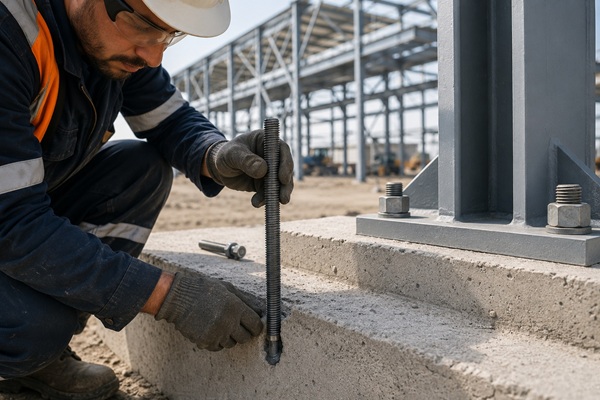
A chemical anchor (also known as an epoxy anchor, resin anchor, or bonded anchor) secures a threaded rod or reinforcing bar inside a concrete hole using a liquid adhesive compound.
Unlike mechanical fasteners (such as wedge or pin anchors) that grip the concrete by expanding against it, chemical anchors fill the entire gap within the hole. Once cured, the resin creates a uniform adhesion bond between the steel rod and the concrete surface.
While chemical systems offer extreme bonding strength, they aren’t always necessary for every structural joint. For standard building layouts with solid concrete structures and healthy spacing, a mechanical option is often faster and more cost-effective. For instance, you can use heavy-duty wedge type anchor bolts to secure column base plates or mezzanine floors where the concrete is already dry and cast-in bolts are not an option. Reserve chemical anchors for high-stress, precision, or variable concrete conditions where mechanical expansion could risk cracking the edges.
Practical Selection Tip: For solid concrete structures with standard load profiles and generous edge distances, mechanical options like pin or wedge type anchor bolts are generally faster and more economical. Reserve chemical anchors for high-stress, precision, or variable concrete conditions.
Skipping tools or using incorrect sizes mid-installation introduces errors. Ensure your team has these items ready before drilling:
Drill perpendicular (90°) to the concrete surface using your hammer drill. Check the manufacturer’s technical data sheet for the exact depth and diameter required.
As a rule of thumb, drill the hole roughly 10mm deeper than the planned embedment depth. This gives a small pocket for any microscopic dust remnants to settle into without blocking the rod.
Leftover concrete dust acts like a barrier, preventing the resin from sticking to the actual concrete wall. This is the single largest cause of anchoring failures.
Use the 3-3-3 Cleaning Method:
The ambient temperature and moisture levels heavily dictate your choice of adhesive:
Before inserting the nozzle into the hole, squeeze out a small amount of resin onto a scrap piece of cardboard until the two components blend into a uniform color. Discard these first 2 to 3 shots. Unmixed resin at the start of a cartridge will never cure.
Insert the mixing nozzle completely to the back of the hole. Pump the resin while slowly withdrawing the nozzle. Fill the hole roughly two-thirds (2/3) full. This ensures that when the steel rod is inserted, the displaced resin fills the remaining space completely without causing excessive waste.
Mark your required embedment depth on the steel rod using tape or a marker.
Push the rod into the hole using a slow, twisting motion. The twist helps break any remaining air pockets and distributes the resin evenly across the threads. Never hammer or ram the rod in. Impact creates hidden voids in the adhesive matrix, weakening its ultimate capacity.
Once the rod is in place, do not disturb, adjust, or touch it until the resin has fully cured. Note the massive impact that ambient site temperatures have on chemical behavior:
| Concrete Temperature | Gel/Working Time (Approx.) | Full Cure Time (Approx.) |
|---|---|---|
| 5°C (Winter/Cold Storage) | 20–25 minutes | 48+ hours |
| 20°C (Mild/Standard) | 8–10 minutes | 24 hours |
| 35°C+ (Peak Summer) | 3–5 minutes | 12 hours |
Site Warning: On hot summer days in regions like Maharashtra or Gujarat, working time drops significantly. You may only have 3 minutes to insert and align the rod before the resin begins to set. Work in manageable batches.
Once the full cure time has passed, place your fixture, washer, and nut over the anchor. Use a calibrated torque wrench to tighten the nut to the torque value specified on the resin data sheet. Do not overtighten, as excessive force can stress or fracture the concrete collar near the top of the hole.
| Resin Type | Best Suited For | Temperature Range | Relative Cost |
|---|---|---|---|
| Epoxy | Extreme structural loads, heavy machinery bases, core-drilled holes, alkaline environments (cement/chemical plants). |
5°C to 40°C | Higher |
| Vinylester | High-performance needs, cracked concrete, seismic zones, coastal environments with salt/moisture. |
0°C to 40°C | Medium |
| Polyester | Non-structural applications, masonry, hollow brick (with sleeves), interior dry conditions. |
10°C to 35°C | Lower |
Cure time depends entirely on the concrete’s temperature. In hot weather (35°C+ Environments), some resins cure in as little as 12 hours. In cold or air-conditioned environments (5°C), it can take 48 hours or longer. Always consult the specific product container for exact timings.
Yes, but you must select a specific underwater-rated epoxy or vinylester resin. Standard polyester resins lose their properties or fail to cure entirely if water is present in the drilled hole.
Yes. If you have leftover resin in a cartridge, leave the used mixing nozzle attached. The resin inside the nozzle will harden and seal the cartridge. When you are ready to use it again, remove the old nozzle, wipe the cartridge opening clean, attach a fresh static mixer nozzle, and remember to discard the first few pumps again.
In a hollow block, injected resin would simply drop into the empty internal cavity and disappear. A mesh or plastic screen sleeve holds the resin around the anchor rod, forcing it to squeeze through the mesh holes to form a mechanical key inside the block’s hollow section.
Chemical anchoring provides an incredibly strong, durable, and reliable connection, provided the material rules are respected. By ensuring proper hole cleanliness, monitoring your local site temperatures, and picking the correct resin chemistry, you can completely avoid typical anchoring failures.
If you are managing an upcoming industrial or civil project and need technical guidance on anchor selection—whether it requires chemical systems, mechanical wedge anchors, or custom foundation bolts—the engineering team at Aim Tech Engineering can assist you with standard-compliant solutions.